

News


Guide to Indwelling Catheter Insertion
Introduction:
At Solmed Medical Supplies, your well-being is our top priority. We want to ensure that every step of your healthcare journey is informed and comfortable. In this blog post, we're diving into the comprehensive catheter insertion technique based on the Australian government guidelines (NSW Health Guideline GL2021_015). Whether you're a healthcare practitioner or an individual managing catheterisation at home, this guide is for you.
Understanding the Guidelines:
The NSW Health Guideline GL2021_015 outlines the best practices for catheter insertion, covering aspects such as personal protective equipment, necessary equipment, and the step-by-step procedure.
Personal Protective Equipment (PPE):
When it comes to catheter insertion, safety is paramount. Clinicians are advised to wear the following PPE to maintain asepsis and protect against blood and body fluid exposure:
- Gloves
- Mask
- Eye protection
- Apron/Gowns
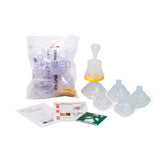
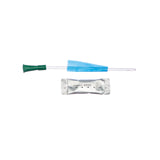
Equipment for Catheter Insertion:
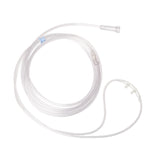
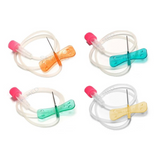
Proper equipment is crucial for a successful catheter insertion. Ensure you have the following items ready:
- Aseptic field/trolley
- Gauze squares
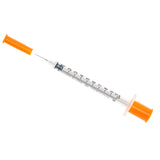
- 10mL Luer Slip concentric syringe
- Sterile paper towel
- Large (fenestrated) drape
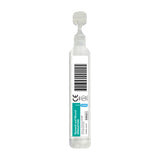
- Sachet of water-soluble lubricant
- Sterile trays
- Sterile water for injection
- Sterile 0.9% sodium chloride squeeze pack (30mL)
- Batch tracking patient label
- Catheter securing device
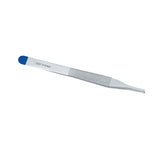
- Plastic disposable forceps
- Sterile anaesthetic lubricating gel (for male patients)
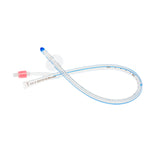
Catheter Insertion Procedure:
Follow these steps for a successful and aseptic catheter insertion:
- Perform hand hygiene on entry into the patient zone. Adhere to Five Moments for Hand Hygiene throughout the procedure.
- Explain the procedure to the patient and gain verbal consent from patient or person responsible (consider using the interpreter service and communication aids if necessary). Wash the genital area with soap and water before the procedure. If the patient or environment was touched, perform hand hygiene.
*Some clinicians may prefer to insert lignocaine for male patients (Step 14) before Step 3. Before inserting lignocaine, clean the urethral meatus and ensure that hand hygiene is performed before and after this step.
- Clean the trolley. Perform hand hygiene. Gather equipment and PPE required for the procedure. Ensure that a suitable receptacle for rubbish is available nearby. Perform hand hygiene.
- Apply manual handling principles and set the bed at a suitable height for the procedure. Position patient in supine position.
*For female patients, ensure supine position with the knees flexed and separated and feet flat on the bed, about 60 cm apart. If uncomfortable, instruct the patient either to flex only one knee and keep the other leg flat on the bed, or to spread legs as far apart as possible. The left lateral position may need to be considered.
Ensure adequate privacy is maintained (e.g. draw screens, cover patient) and, if available, adequate light is focused on the perineal area. Place protective sheet under the patient.
- Perform hand hygiene. If an existing catheter is being replaced, do the following before Step 6:
- Don PPE (gown/apron, mask, eye protection and non-sterile gloves)
- Deflate balloon with a 10mL syringe
- With the dominant hand remove catheter
- Discard used catheter
- Remove non-sterile gloves and perform hand hygiene
- Remove gown/apron and perform hand hygiene.
- Assemble the aseptic field. Add any additional sterile equipment required to the aseptic field (e.g. catheter, drainage device, sterile water and syringe if not included in catheter pack).
- Open sterile gloves onto the aseptic field or a clean surface e.g. dressing trolley, maintaining the sterility of the gloves.
- Perform hand hygiene, don PPE (gown/ apron, mask and eye protection).
- Perform hand hygiene for aseptic procedures and don sterile gloves.
- Fill syringe with 5-10mL of sterile water (maintain sterility of the gloves).
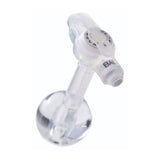
- Remove catheter from the sterile inner plastic sleeve, protecting the catheter key part using a non-touch technique ensuring to maintain sterility of the catheter at all times.
*If lignocaine was not inserted for male patients at step 2 - Attach nozzle to lignocaine syringe.
- Lubricate catheter tip and place into an empty tray. This is the drainage tray.
- Open the fenestrated sterile drape and place it over patient’s genitals. If gloves are contaminated during cleaning, remove gloves and discard. Perform hand hygiene for aseptic procedures and don new sterile gloves. Then progress to Step 14.
- Cleaning method 1: Using non-touch technique, pour 0.9% sodium chloride into an empty tray. This is the cleaning tray. Add gauze squares to 0.9% sodium chloride and discard forceps if used.
*Female Patient: With non-dominant hand, use the saline swabs to separate the labia minora exposing the urethral meatus. Using dominant hand, clean the labia minora and urethral orifice with gauze soaked with 0.9% sodium chloride, performing one downward stroke per square.
*Male Patient: With non-dominant hand and using a saline swab, hold the patient’s penis. Retract foreskin if uncircumcised. Using dominant hand, clean penis with saline swabs from penis tip downwards, one stroke per swab
Discard saline swab after each stroke - do not re-use. When cleaning is completed, discard cleaning tray. OR Cleaning method 2: Irrigate the insertion site with 30 mL of 0.9% sodium chloride.
- Open fenestrated drape and place it over patient’s genitals.
*Male Patient: If lignocaine was not inserted at step 2 - Hold the penis at right angle to the body and insert the lignocaine nozzle into urethral meatus. Inject the lignocaine gel into the urethra ensuring firm seal around the meatus. Compress the penis and hold for 3-5 minutes to contain the gel within the urethra.
- Pick up catheter with the dominant hand and ensure that the drainage end of the catheter is in the tray. Place drainage tray on the fenestrated drape between patient’s legs.
*Female Patient: Use non-dominant hand and gauze square to separate the labia minor and expose urethral meatus. Use the dominant hand to gently insert catheter 5 – 7 cm of the catheter into the urethral meatus. When urine flows into the tray, advance the catheter 2 – 3 cm then inflate balloon with sterile water in accordance with manufacturer’s recommendations and with clinical discretion.
*Male Patient: Hold penis at a 90o angle (slight traction upwards also helps) then gently insert catheter into urethral meatus. When resistance is felt, lower penis and continue inserting until the start of the Y junction of catheter. When urine flows, inflate balloon with sterile water in accordance with manufacturer’s recommendations and with clinical discretion.
If there is no urine flow following insertion, do not inflate balloon. Examine patient to ensure catheter is in the urethra. If unable to advance the catheter with firm pressure, abort the procedure and notify team leader, specialist nurse and/or medical officer.
Always use a new catheter and reset the aseptic field if a subsequent insertion attempt is required.
Note: Once you have a grip on the penis/labial with your non-dominate hand, it cannot move position, otherwise the area becomes re-contaminated and needs recleaned.
If catheter has been incorrectly inserted into the vagina, keep initial catheter in situ until the second catheter is correctly placed in the urethra.
Observe patient for any signs of discomfort. Gently withdraw catheter until resistance is felt.
- Securely connect catheter to drainage device (e.g. catheter bag or catheter valve) on the aseptic field. Advise patient to relax their legs. Remove drainage tray, drape and protective sheet and discard.
*Male Patient: Reposition foreskin, if uncircumcised
- Before securing the catheter in place e.g. with catheter securing device, the clinician must check if there is enough slack and that there's no undue tension on the catheter. If the catheter is to have traction applied ensure that a written order is provided and that the clinician also documents this on the progress notes.
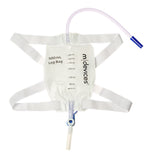
- Secure catheter and drainage device. Position drainage bags securely, ensuring that it is below the level of the bladder and is not touching the floor. Ensure that the patient is dry, covered and in a comfortable position.
- Dispose of waste in accordance with local waste policy.
- Remove gloves and perform hand hygiene.
- Remove apron/gown. Perform hand hygiene. Remove eye protection then mask and perform hand hygiene.
- Document catheter insertion in the patient’s healthcare record.
Note: if a urine sample is required, that it is to be free dripped directly into the specimen cup. Not taken from the drainage tray (which would have some amount of gel in it from the procedure, might affect your sample).
Documenting catheter insertion
The insertion of a urinary catheter must be documented in the patient’s health care record. At a minimum, the following information must be included:
- How consent was obtained and whom it was obtained from
- Indication for catheterisation
- Catheter option used (in/out, IDC, SPC)
- Size and type of catheter
- Time and date of insertion
- Balloon volume in
- Total urine volume drained on insertion (refer to the fluid balance chart)
- Any abnormalities observed during or after catheter insertion (e.g. pain, bleeding)
- Any clinical complications during insertion (e.g. false passage, haematuria)
- Presence of UTI signs and symptoms
- Colour of urine, sediment or abnormality
- Whether a urine specimen for urinalysis/culture was collected
- Post procedure tests that are clinically relevant; and
- Follow up actions (e.g. review of catheter, catheter removal).
Please Note: While this guide offers comprehensive instructions, it is imperative to consult a healthcare provider for personalized advice and guidance tailored to your specific circumstances. Solmed Medical Supplies provides this information for educational purposes only and does not substitute professional medical advice.
Conclusion:
This is a condensed overview of the catheter insertion process following the Australian government guidelines. For the full, detailed guidelines, please refer to the official NSW Health Guideline GL2021_015 here.
At Solmed Medical Supplies, we're committed to providing you with the information you need for a safe and comfortable healthcare experience. If you have any questions or concerns, feel free to reach out to our team. Your well-being is our priority!
Stay informed, stay healthy!
Reference: NSW Health Guideline GL2021_015 - Issue date: August-2021